Your Setup, Unlocked: The Essential Monitor Arm Insights
- Engineered Ergonomics: Monitor arms are crucial for preventing neck and eye strain, particularly when managing large or multiple displays. Their precise adjustability and inherent structural stability ensure optimal, unwavering viewing angles.
- Reclaim Your Desk: Say goodbye to bulky monitor stands. Arms free up significant desk space, allowing for a cleaner aesthetic and more room for essential peripherals.
- Heavy-Duty is a Must for Ultrawides: Displays like the formidable Samsung Odyssey G9 demand robust arms. Always opt for models (e.g., Ergotron HX, MSI MAG MT201D) rated for higher weights, typically 28-44 lbs, paying close attention to specific tilt-joint torque ratings to prevent ‘slow sink’.
- Gas Spring vs. Mechanical: Engineering Trade-offs: Gas spring arms provide fluid, ‘one-finger’ adjustment, ideal for frequent repositioning, but require a minimum activation weight to compress the strut. Mechanical springs deliver robust and consistent performance over the long term, often with a wider effective weight range.
- Precision Installation & Tuning: Achieving stability and smooth movement hinges on proper tension adjustment and secure mounting, whether you choose a desk clamp (verifying desk lip depth for a secure bite) or grommet method. Do not underestimate this critical engineering step; it is the difference between a floating display and a falling one.
- Beyond the Arm: Holistic Command Center Design: True optimization integrates meticulous cable management, considers your entire workspace ecosystem, and ensures synergy with elements like sit-stand desks for a truly refined setup, built on a foundation of structural integrity.
The Evolution of Your Command Center: Why Monitor Arms Are Essential
For too long, the humble monitor stand has been the silent bottleneck in countless gaming setups. Limited adjustability, wasted desk space, and a static viewing experience are no longer acceptable in an era of immersive ultrawides and competitive esports. We, as gamers and professionals, crave dynamic control over our digital real estate. Enter the monitor arm: a transformative piece of hardware that redefines ergonomics, aesthetics, and overall productivity. This guide will equip you with everything you need to know to choose, install, and optimize the perfect monitor arm for your ultimate gaming sanctuary, ensuring your display setup is a force multiplier, not a limitation.
Beyond the Stand: The Unrivaled Advantages of a Monitor Arm
- Unleashed Ergonomics: Achieve precise height, tilt, swivel, and rotation for optimal eye-level viewing, drastically reducing neck and eye strain. This precision is vital for long gaming sessions or intense work.
- Maximized Desk Real Estate: Eliminate bulky monitor bases, freeing up valuable space for peripherals, audio gear, or a cleaner minimalist aesthetic. More space means less clutter and more focus.
- Dynamic Adjustability: Effortlessly switch between sitting and standing, or reconfigure your display for collaborative work or content creation. This flexibility is key for modern, adaptable workspaces.
- Integrated Cable Management: Keep your setup pristine and clutter-free with hidden cable channels and routing solutions. A tidy desk is a productive desk, reducing visual noise and enhancing focus.
- Enhanced Aesthetics: Elevate the visual appeal of your workspace with a sleek, floating display that complements your high-end gear. It’s about creating an inspiring, photo-worthy haven that supports mental health and productivity.
Reclaiming Your Desk: The Space Revolution
The most immediate and satisfying impact of a monitor arm is the liberation of your desk surface. Traditional monitor stands, especially for larger displays, consume significant space, limiting your ability to organize peripherals, place speakers, or simply enjoy a clean workspace. Monitor arms lift your display off the desk, creating an expansive, uncluttered canvas for your gaming and productivity needs. This isn’t just about aesthetics; it’s about creating a more functional and less distracting environment where every item has its dedicated home, contributing directly to focus and goal attainment.
Ergonomics Unleashed: Combatting Gamer Strain
Perhaps the most critical advantage of a monitor arm, especially for long gaming sessions or professional work, is its ergonomic superiority. Standard stands often force suboptimal viewing angles, leading to neck, shoulder, and eye strain. The inability of even premium stands, like Apple’s Pro Display XDR, to accommodate diverse user heights (as detailed by NASA’s anthropometric data, which warns against relying solely on 50th percentile data) underscores this universal problem. A quality monitor arm allows you to precisely position your screen at eye level, adjust tilt to reduce glare, and even rotate for portrait mode, ensuring your posture remains healthy and comfortable. This is particularly vital for multi-monitor or stacked setups, where poor positioning can quickly lead to discomfort and reduce your competitive edge.
Decoding Monitor Arms: Types, Technologies, and What Powers Them
Not all monitor arms are created equal. Understanding the different types and the counterbalance technologies they employ is crucial for selecting the right solution for your specific needs, especially when dealing with heavy gaming monitors or complex multi-display setups. This knowledge empowers you to make an informed decision that directly impacts your setup’s stability, adjustability, and long-term performance. We will delve into the underlying mechanical engineering principles that dictate an arm’s ability to maintain position and prevent common failure points like display sag and drift.
| Feature | Gas Spring (Gas Strut) | Mechanical Spring Assisted |
|---|---|---|
| Mechanism | Sealed cylinder with compressed gas (e.g., hydrogen) provides consistent force. | Precision-engineered springs and tensioning mechanisms. |
| Movement | Superior, fluid, ‘one-finger’ adjustment; effortless positioning. | Smooth operation with slightly more tactile feedback; robust. |
| Weight Capacity | Excellent for heavy monitors (up to 16kg/35lb+), ideal for ultrawides, but requires a *minimum activation weight* to compress the strut effectively. | Accommodates broad weight ranges (up to 10kg/22lb+); capacity increasing with new designs. Less susceptible to minimum weight issues. |
| Activation Threshold | Significant. Requires a specific minimum monitor weight to compress the gas strut, preventing the arm from springing up uncontrollably. | Negligible. Offers consistent performance even with lighter displays as the mechanical tension is not dependent on gas pressure. |
| Cost | Typically 20-35% premium due to higher manufacturing demands. | Generally more cost-effective with lower initial investment. |
| Environmental Factors | Susceptible to performance degradation from temperature/altitude changes; potential gas pressure loss over time. | Less affected by environmental shifts; proven long-term reliability. |
| Ideal Use | Executive offices, trading floors, heavy-duty gaming setups where effortless, frequent adjustment is paramount, *and monitor weight meets the activation threshold*. | High-volume offices, educational, healthcare, clinical settings, and many gaming setups requiring robust, consistent performance for a wider range of display weights. |
Single, Dual, or Triple: Sizing Up Your Setup
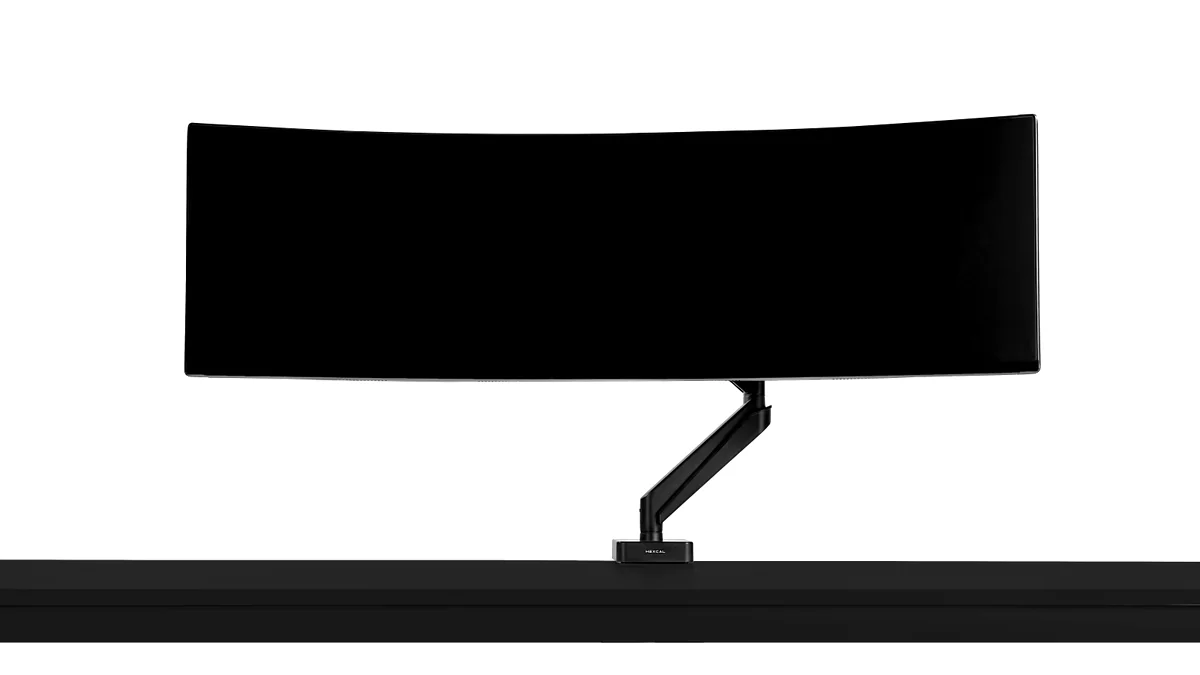
- Single Monitor Arm: Perfect for a clean, minimalist setup with one display, especially large ultrawides like the Samsung Odyssey G9. It offers maximum flexibility for that single screen, allowing precise ergonomic placement.
- Dual Monitor Arm: Ideal for productivity and multi-tasking gamers. These can be configured side-by-side for a wide field of view or stacked. However, stacked setups require careful ergonomic consideration to prevent neck strain, ensuring the primary monitor is always at eye level.
- Triple Monitor Arm / Modular Systems: For the ultimate command center, these setups provide unparalleled screen real estate. They often involve a central arm with additional ‘bow kits’ or modular links. Such extensive configurations require significant desk space and meticulous planning for stability and integrated cable management.


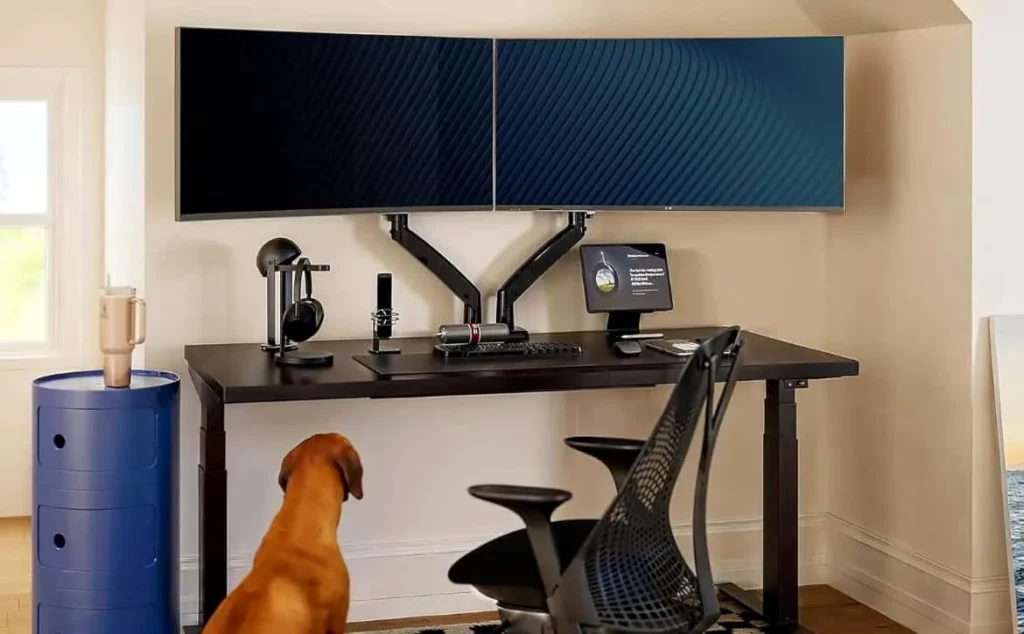
Examples of single and dual monitor arm setups, demonstrating versatility and space-saving.
What to Look For: Critical Engineering Features for Your Gaming Rig
- 1. Weight Capacity & Structural Integrity: This is paramount. Always check your monitor’s weight (without its stand) and ensure the arm’s capacity comfortably exceeds it. For ultrawides like the Samsung Odyssey G9, you’ll need heavy-duty arms rated for 28-44 lbs. Crucially, investigate the tilt-joint torque ratings (Nm) for heavy-duty pivots and the pivot-point friction coefficients to ensure stability and prevent the dreaded ‘slow sink’ or horizontal drift over time. This is where engineering precision truly matters.
- 2. VESA Compatibility: Almost all modern monitors and arms adhere to VESA standards (75x75mm or 100x100mm). Confirm your monitor has VESA holes; if not, you’ll need an adapter (e.g., Apple’s $200 VESA Mount Adapter for the Pro Display XDR), adding to cost and complexity.
- 3. Adjustability Range: Look for ample vertical adjustment (height), horizontal extension (reach), tilt (forward/backward), swivel (side-to-side), and rotation (portrait/landscape). More range means better ergonomics and greater flexibility for different tasks or users.
- 4. Mounting Options & Desk Compatibility: Most arms offer both C-clamp and grommet options. For C-clamps, note specific desk lip depth compatibility (e.g., the MSI MAG MT201D supports 10-85mm thicknesses). For grommet mounts, ensure your desk hole matches the arm’s requirements (e.g., MSI MAG MT201D supports 10-35mm). If considering a wall mount, you must research wall-stud spacing and load-bearing requirements for your specific wall material (drywall vs. brick), as improper anchoring can lead to catastrophic failure under the leverage of a heavy arm.
- 5. Cable Management: Integrated channels, clips, or covers help route cables neatly, reducing clutter and enhancing aesthetics. Assess how easy it is to use and if it can accommodate all your cables, ensuring enough slack for full range of motion, especially with standing desks.
- 6. Build Quality & Warranty: High-quality arms use durable materials like aluminum and steel, often certified by standards like BIFMA LEVEL 2 for sustainability and worker well-being (as seen with Ergotron). Look for long warranties (10+ years for premium brands like Ergotron, Herman Miller, Humanscale) as an indicator of durability and manufacturer confidence. This investment often outlives the monitor itself.
VESA: Your Universal Mounting Key
The Video Electronics Standards Association (VESA) mount is the industry standard for attaching monitors to arms. Before purchasing any arm, confirm your monitor has a VESA pattern (typically 75x75mm or 100x100mm) on its back. If your monitor lacks VESA support, you’ll need to purchase a specific VESA adapter kit, which can add to the cost and complexity. Always prioritize VESA compatibility to avoid unnecessary headaches and ensure a secure mount.
Installation & Fine-Tuning: Engineering a Stable Setup
Even the best monitor arm is only as good as its installation. While assembly can seem daunting, a methodical approach ensures stability, smooth movement, and prevents potential damage to your desk or monitor. Always refer to your specific arm’s instructions, but here’s a general overview to guide you through the process, ensuring your setup is rock-solid from the start and engineered to prevent the ‘slow sink’ or unwanted drift.
- 1. Clear Your Workspace: Remove all items from your desk to provide ample room for assembly. This prevents accidents and gives you a clean canvas to work on.
- 2. Assemble the Arm Base: Attach the base and arm extension pieces according to the instructions. Many premium arms offer tool-free installation or minimal screw work, streamlining this step.
- 3. Secure the Mount: Choose between the C-clamp (for desk edges) or grommet mount (for through-desk holes). Ensure your desk’s thickness falls within the arm’s specified range. Tighten securely, but be mindful not to over-tighten. A metal plate can offer extra protection, distributing the load.
- 4. Attach the VESA Plate to Monitor: Connect the VESA plate to the back of your monitor. For larger displays, a second person is highly recommended for safety.
- 5. Mount Monitor to Arm: Carefully slide or click the VESA-mounted monitor onto the arm. Ensure it’s locked securely.
- 6. Adjust Tension: The Critical Engineering Balance: This is the most crucial step. Use the included Allen key to fine-tune the arm’s spring or gas strut tension. The goal is for the monitor to ‘float’ effortlessly at any height without drifting up or down.
- 7. Cable Management: Route your cables through the arm’s integrated channels, ensuring enough slack for full range of motion.
The Tension Adjustment Secret: Mastering Mechanical Stability
The most common issue with new monitor arm installations is incorrect tension, leading to ‘slow sink’ or unwanted upward drift. This adjustment is a precise engineering balance. If your monitor slowly sinks, the tension is too low; if it springs up, it’s too high. Beyond vertical movement, this tuning critically sets the pivot-point friction coefficients that prevent horizontal drift. Don’t be afraid to make multiple, significant turns of the adjustment screw—some arms require many full rotations to balance heavy monitors and lock in the mechanical stability required for a high-performance setup.
Advanced Stability Engineering: Battling Sag and Drift
The subtle art of preventing ‘slow sink’ and horizontal drift in heavy ultrawide monitors is a testament to sophisticated mechanical engineering. Manufacturers like Ergotron and MSI employ robust materials and precision-machined pivot points designed to maintain high friction coefficients even under significant load. This isn’t just about raw weight capacity; it’s about the ability of the tilt joint to hold its angle without gradual creep, often specified by torque ratings (Nm). When selecting an arm, understanding these underlying design choices provides confidence that your expensive display will remain exactly where you position it, safeguarding your investment from the silent threat of gravitational fatigue. For curved ultrawides, specialized heavy-duty pivots are engineered to counteract the monitor’s unique center of gravity and leverage, ensuring unwavering stability.
LoadSyn’s Top Picks: Best Monitor Arms for Gamers
Based on our rigorous testing and analysis of market intelligence, these are LoadSyn’s top recommendations for monitor arms, catering to various needs and budgets. We cut through the marketing hype to bring you the gear that truly performs, backed by measurable impact on your gaming setup and engineered for lasting stability.
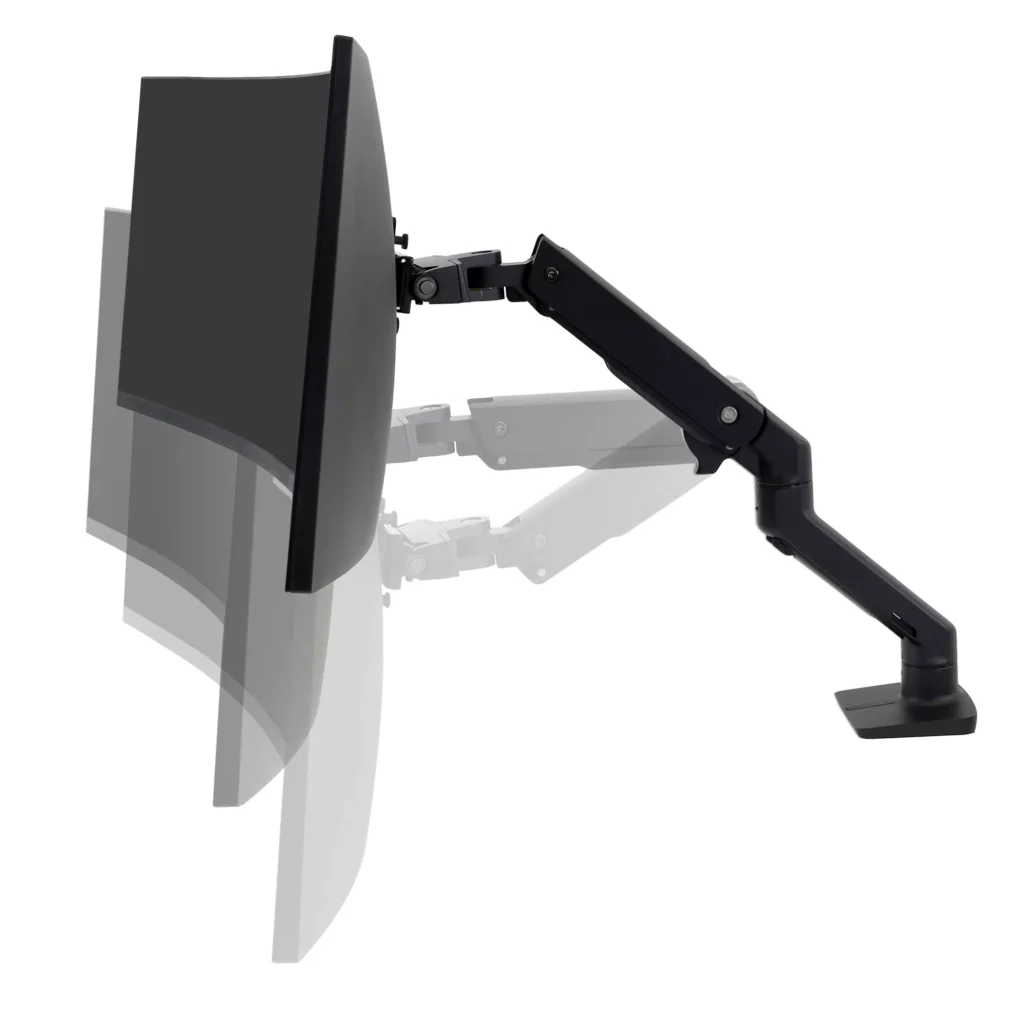
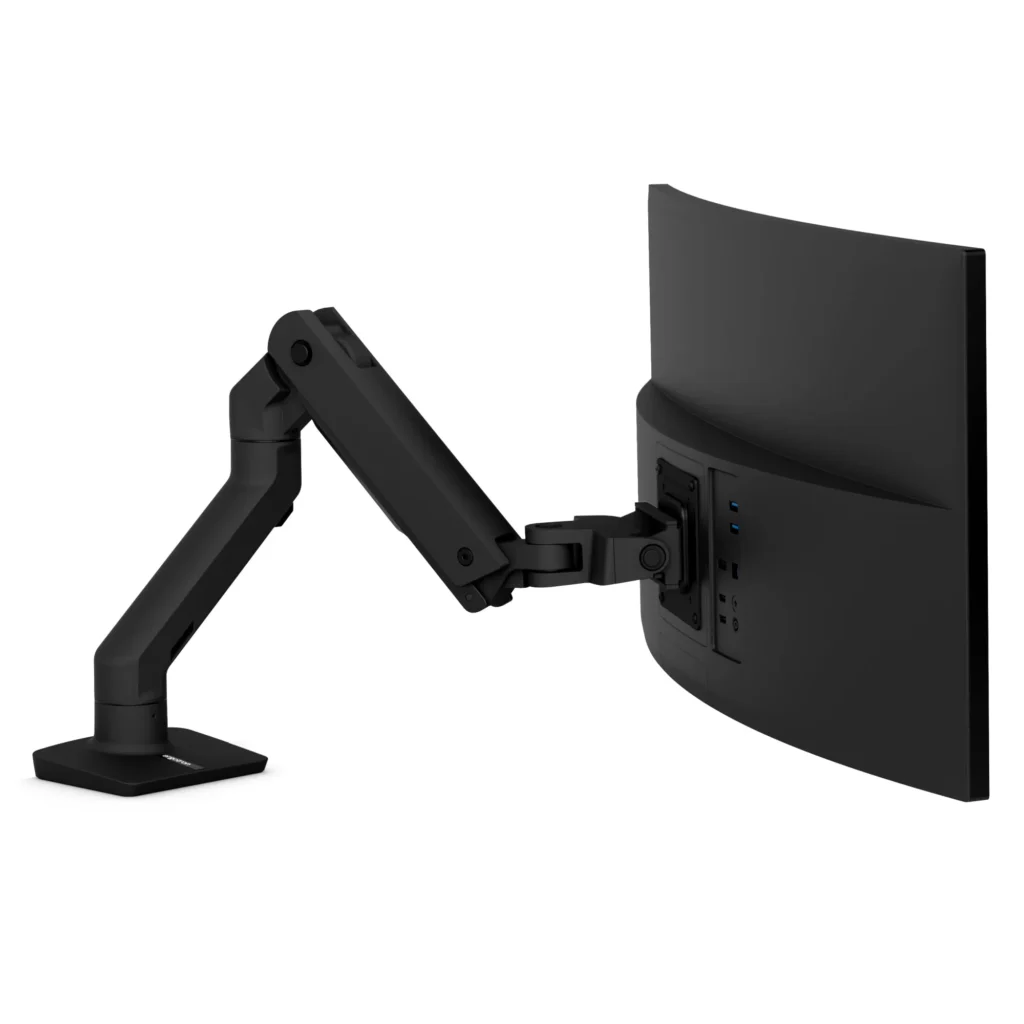
Best Heavy-Duty Ultrawide Arm: Ergotron HX Desk Monitor Arm with HD Pivot
Pros
- Unmatched stability and durability for large, heavy ultrawide monitors (up to 49″, 42 lbs), specifically engineered for models like the Samsung Odyssey G9.
- Includes or supports the essential *HX Heavy-Duty Tilt Pivot (98-540-216)*, specifically designed for 1000R curved ultrawides.
- Award-winning design (iF Design Award 2018) with sleek aesthetics.
- Patented Constant Force Technology for smooth, effortless adjustment.
- Excellent integrated cable management.
- Modular scalability for dual/triple setups with separately sold HX Bow Kits.
- Robust 10-year warranty, backed by BIFMA LEVEL 2 sustainability features.
Cons
- High initial cost (MSRP around $339+), a significant investment for many gamers.
- The Heavy-Duty Tilt Pivot (98-540-216) is often a necessary add-on for the deepest curved displays.
- Slightly limited height adjustment compared to some lighter arms.
Ergotron HX Desk Monitor Arm (with HD Pivot)
Best Mid-Range All-Rounder: Fully Jarvis Single Monitor Arm
Pros
- Smooth range of motion and solid build quality, offering reliable performance for daily use.
- Easy setup process, getting you up and running quickly.
- Industry-leading 15-year warranty, providing exceptional long-term peace of mind.
- Supports monitors up to 32 inches and 20 pounds, accommodating most mainstream displays.
- Excellent value for its performance, striking a great balance between cost and features.
Cons
- Slightly less extension and vertical range than the Ergotron LX.
- Cable management is functional but not as refined as some premium options.
- May be marginally harder to set up than the Ergotron LX.
Best Budget-Friendly Options: MSI MAG MT201D / Huanuo HNSS6
For gamers seeking a robust solution without the premium price tag, the MSI MAG MT201D presents a compelling option, especially for dual ultrawide setups. Its comprehensive feature set and heavy-duty design directly address common concerns about structural integrity in budget-friendly arms.
MSI MAG MT201D Monitor Mount
Pros
- MSI MAG MT201D: Exceptional weight capacity for its price point (44 lbs per screen), supporting massive 45-inch ultrawides.
- Huanuo HNSS6: Utilizes gas spring technology for effortless movement and features intuitive clamp adjustment.
Cons
- MSI MAG MT201D: Setup can be complicated with numerous screws and tools; plastic cladding over a metal frame.
- Huanuo HNSS6: Gas springs can lose potency over time, and its cable management covers can be finicky.
Premium Ergonomics & Design: Herman Miller Flo / Humanscale M8.1
Pros
- Herman Miller Flo: Boasts a smooth, natural design and exceptional build quality, backed by a 12-year warranty.
- Humanscale M8.1: Features patented Weight-Compensating Spring Technology and Smart Stop functionality.
Cons
- Significantly higher price point ($400-$500+).
- Herman Miller Flo: Offers slightly less adjustment range than the Ergotron LX.
- Humanscale M8.1: Base model supports up to 28 lbs (single), which may not be enough for the heaviest ultrawides.
Beyond the Arm: Integrating Your Setup for Total Optimization
A monitor arm is a powerful upgrade, but it’s just one piece of the puzzle. For a truly optimized gaming and productivity setup, consider how your arm integrates with your entire workspace ecosystem.
- Smart Cable Management: Beyond the arm’s integrated channels, utilize cable ties, sleeves, and under-desk trays to hide all wires.
- Sit-Stand Integration: Ensure your monitor arm has enough vertical travel and that your cables have sufficient slack to accommodate full height adjustments.
- Lighting & Environment: Optimize your lighting to reduce eye strain and glare. Consider smart lamps and natural light sources.
- Quality Peripherals: Pair your ergonomic display setup with an ergonomic keyboard and a comfortable mouse to complete the healthy computing experience.
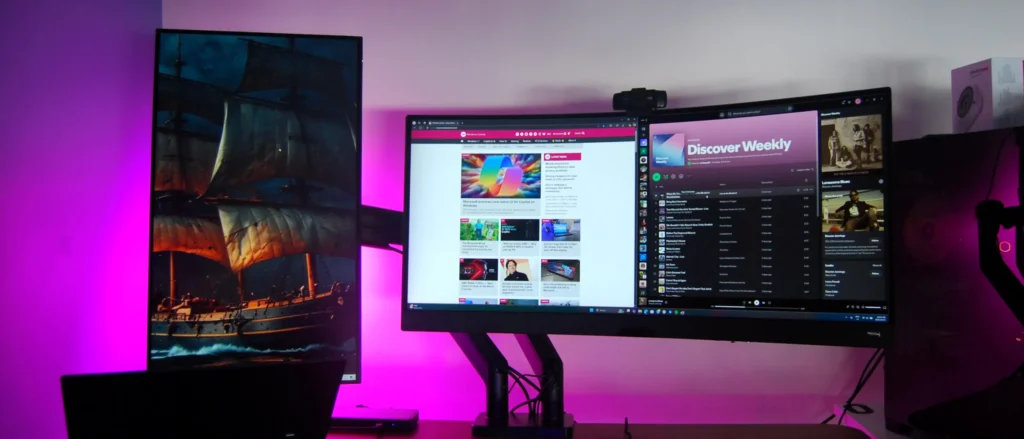
Real-World Setups: Engineering Your Personal Command Center
“My workspace philosophy centers on three core elements: Functionality (efficient organization for easy access), Minimalism (clutter removal to foster creativity), and Productivity (crafting a space that enhances peak performance).”
— Faizur Rehman, Independent Creative Director and Educator
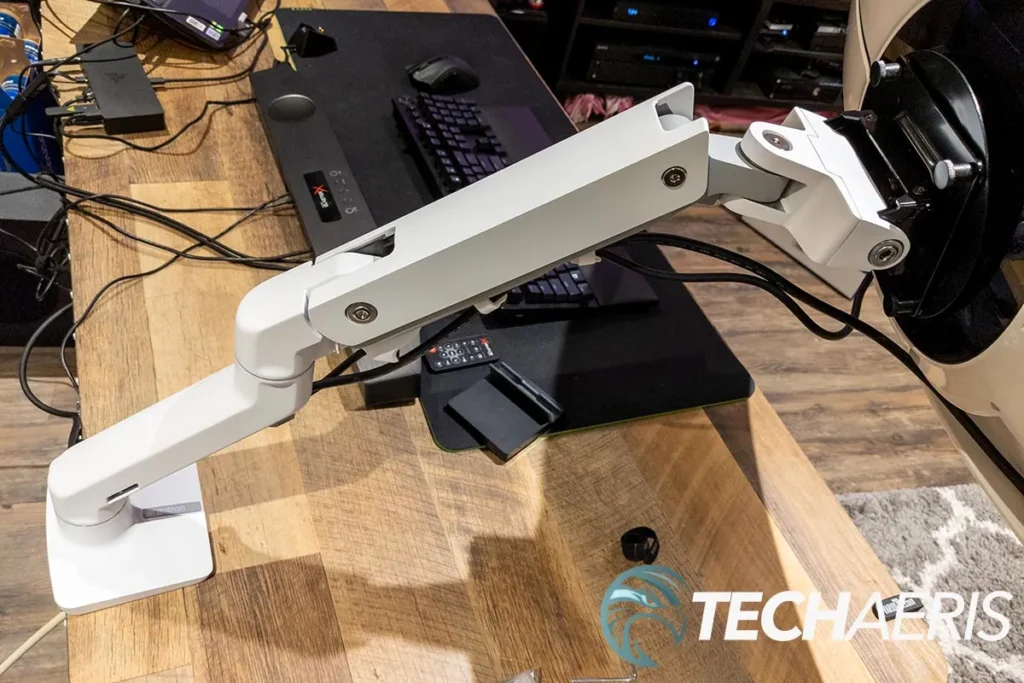
The common thread in high-end setups is the monitor arm’s foundational role. These individuals prioritize not just ergonomic comfort and maximized screen real estate, but also the engineered stability and a clean aesthetic, demonstrating the tangible benefits of investing in a quality mounting solution. They prove that a well-chosen monitor arm, properly installed, is foundational to a high-performance, inspiring workspace that safeguards your hardware investment.
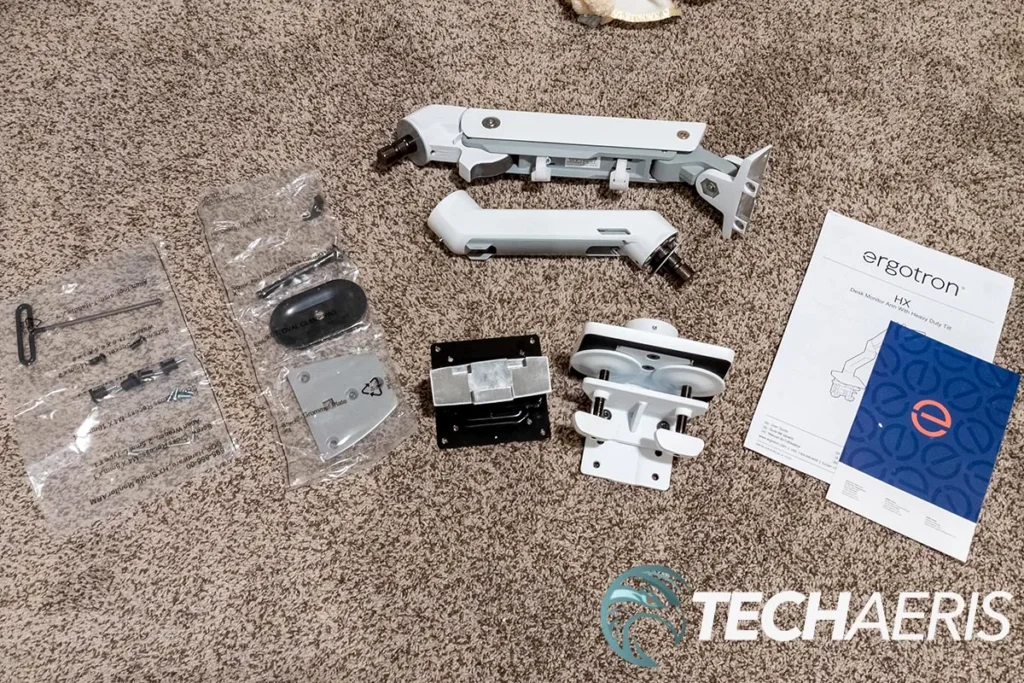
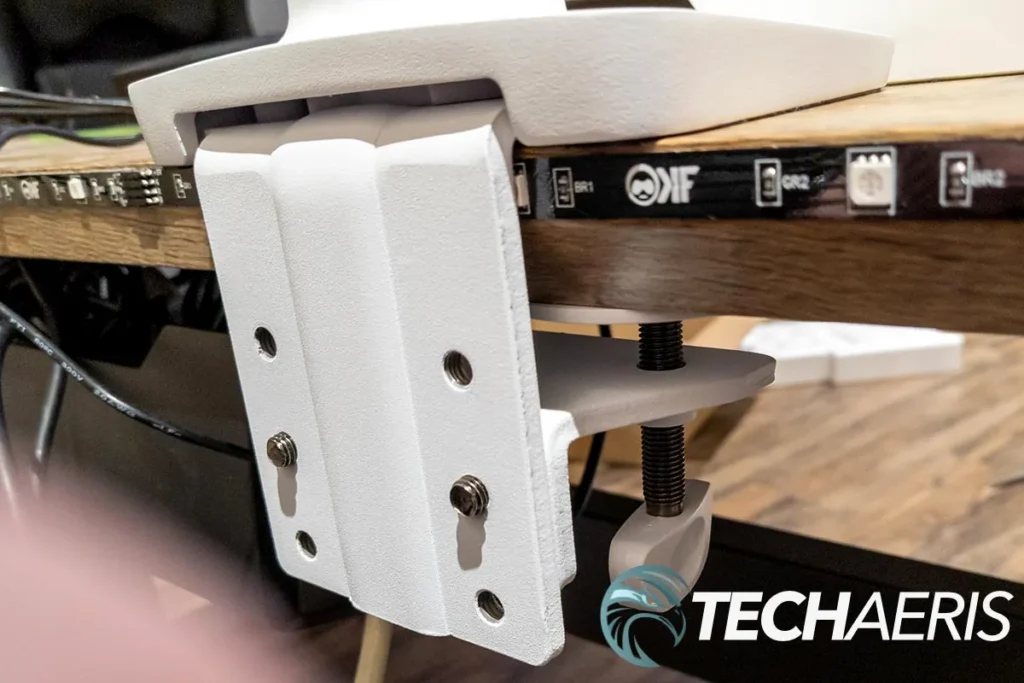
A glimpse into the components and installation of a high-end monitor arm, crucial for a stable setup.
Common Questions & Concerns: Engineering for Peace of Mind
Are monitor arms stable, or will my screen wobble during typing/gaming?
Quality monitor arms, when properly installed on a sturdy desk, offer excellent stability. Wobble is often a symptom of a lightweight desk, an arm extended too far from its base, or improper tension adjustment.
Will a monitor arm damage my desk?
Cheap clamps can scratch or dent softer desk surfaces. High-quality arms often include pads or wider clamps to distribute force more effectively. For delicate wood or bamboo desks, consider using a metal plate between the clamp and the desk.
I want a stacked monitor setup, but I’m worried about neck strain. Is it worth it?
Stacked setups offer immense screen real estate but pose ergonomic challenges. The key is to ensure the primary monitor is at eye level, and the secondary monitor is positioned to minimize neck craning.
How do I ensure a wall-mounted monitor arm has adequate structural integrity?
Wall-mounted arms require meticulous planning. For drywall, you MUST locate solid wood studs using a stud finder; never rely on drywall anchors for heavy ultrawides.
The Unseen Upgrade: Engineering a Superior Gaming Experience
A monitor arm is rarely the flashiest component in a gaming setup, but its impact on ergonomics, aesthetics, and overall functionality is profound. It’s the unseen upgrade that unlocks your display’s full potential, transforming your desk from a cluttered surface into a dynamic, comfortable command center. While the initial investment for a quality arm might seem significant, its durability and the tangible benefits to your health and productivity make it one of the most worthwhile additions to any serious gamer’s arsenal. By choosing the right arm and installing it correctly, you’re not just mounting a monitor; you’re investing in a superior, healthier, and more focused gaming experience that is engineered for longevity and unyielding stability, paying dividends for years to come.